
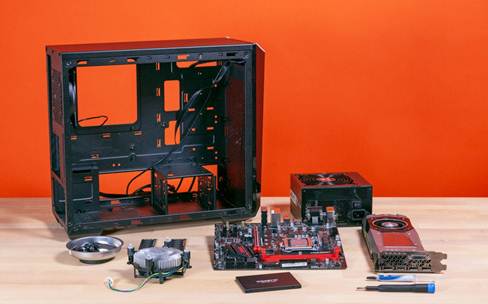
The motherboard is the most important part of the system and installing a motherboard is a complicated process. Whatever the motherboard type is, still the process is the same for all kinds of motherboards. You need time and patience for the installing process, and here are the steps that will let you know how to install a motherboard.
The Hidden Mystery Behind How To Install Motherboard
Prepare your tools
Before installing any kind of component in the system, it is important to note that you are having all the tools. Also, while installing it is mandatory to protect yourself and also the hardware. Installation should be done on the non-conductive surface and avoid carpeted surface for further damage, and also you should wear a wristband to perform the installation.
Measure the blanking plate
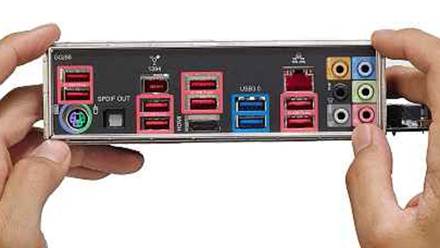
When you buy the motherboard you will also get a blanking plate along with that. The role of the blanking plate is to give access to the ports that the motherboard has. In certain blanking plate, the manufacturer has made a generic blanking plate that will fit into the entire keyboard. In these kinds of plates, you need to remove some metal covers so that it will give access to the motherboard’s ports.
Once the metal covers are removed then hold the blanking plate onto the motherboard. Push the blanking plate against the motherboard and make note of all the ports that are covered.
Remove the unnecessary parts
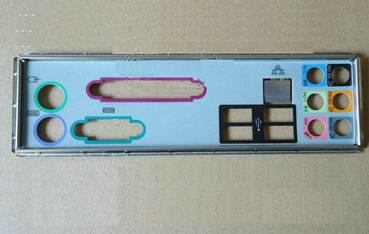
If you need to remove any parts from the blanking plate then do it in this stage itself. You can remove the metal gently out of the metal snaps or in some cases the ports will be covered by the flap, so you need to bent the flap inwards. Make sure to bend the flap enough so that the motherboard will be given the clearance to pass underneath.
Install the I/O shield

For installing the blanking plate, you need to push the plate into the rear gap in the case. Before giving a final press, make sure it is fitted properly. The ridge around the outside of the plate should be clip into the hole. This step is needed to do properly as sometimes the blanking plate won’t fit properly and also it is fiddly to fix. So after fixing, the plate should be stable without any support.
Measure the motherboard space
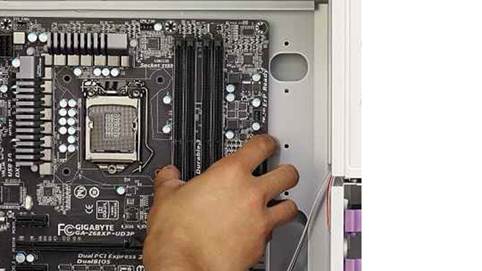
Now you need to find the screw holes to install the motherboard. You should place the case flat on the desk and make sure all the cables have been taken out. Once the place is finalized for the motherboard, then take it back and now slide it gently into the case. Also, make sure that the rear ports are gently pushed against the blanking plate. Mark the screw points in the motherboard and remove them to place them on the foam.
Screw-in standoffs
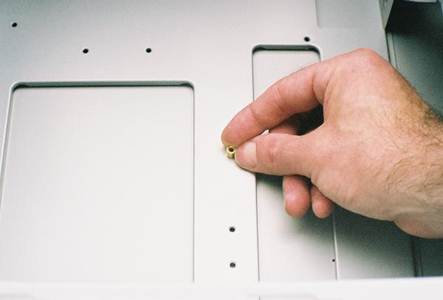
This is the important step as the motherboard is an important part of the system and it should not come in contact with the conductive parts. So, before installing a motherboard make sure you installed the standoffs. These are the screws through which we need to screw the motherboard directly into them.
In some, these screws will come as pre-fixed but it happens rarely. If you have any doubts that where should screw in then you can refer to the user manual which comes along with the motherboard. Once you have found the location and then screw it in using the hand as it doesn’t require any tools.
Install the motherboard
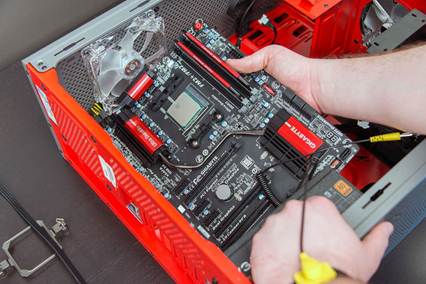
Before installing the motherboard make sure all the screw holes are having risers or standoffs underneath. If anything is missing then you have inserted the risers in the wrong place. While installing you can notice that sometimes the motherboard will come off slightly from the standoffs. This is because of the pressure caused by a backplate which will push the motherboard.
To avoid this, you need to line up the motherboard ports by pushing the backplate and also push the motherboard towards the plate so that the screw holes will line up. This can be achieved by some gentle force.
Screw it properly
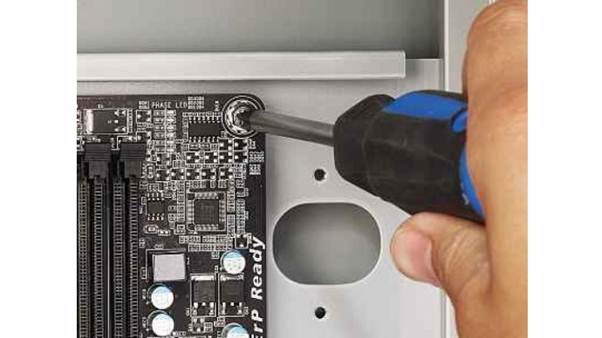
After placing the motherboard properly now you need to screw it down. If you want to make the motherboard line up with the risers then start from the corners, by holding the motherboard firmly. While doing the screw in if you apply too much pressure then the motherboard may break so make sure you are screwing tightly by not causing any damage to the motherboard.
Once the corner is finished, you can start the screw in for other holes. You don’t need to screw in for all the holes in the motherboard, screw in until the board is firmly fixed.
Connect the power cables
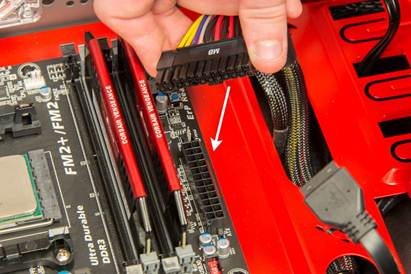
To give power to the motherboard, then you need to plug in the power cables. In most motherboards, there will be a 24-pin long connector and 4-8 smaller connectors. This is located on the right side of the motherboard, and in some cases, the places may vary. So you can use the manual to avoid confusion.
Identify and Plugin secondary connectors
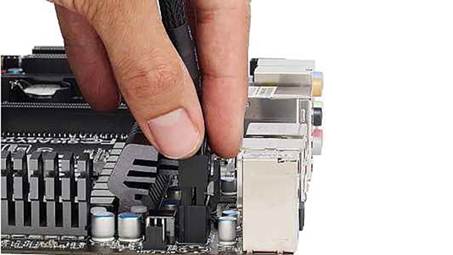
If you are using a modern motherboard then you will get secondary connectors. It is a single four-pin connector or eight-pin connectors. This connector is similar to the 24-pin long connector and here the power supplies will be split into two.
You can locate the secondary connector by referring to the manual. To fix it properly, you need to apply some force and you will get a clipping sound which indicated properly fixed.
Bottom Line:
The motherboard is the integral component of a system, and every device will have a motherboard such as laptops, desktops, tablets, and even mobile phones. So, while installing the motherboard care should be taken and this article on how to install the motherboard will help you with that.