
SSD (Solid State Drive) is the best and useful upgrade that you can make on your computer. But the only thing you need to consider is that your new SSD should be big enough to hold all the files from the drive. So, the migrating of windows from HDD to SSD cloning can be done in simple steps.
Steps for migrating the Windows from HDD to SSD cloning:
What did you need?
To migrate the window from HDD to SSD without installing, you need an SSD apart from this if you are using a laptop then you need to use a cable which is not required for the desktop. You need a back-up of all your data as taking risks with the hard drive will cause problems. So here are the 5 steps to migrate windows from HDD to SSD;
Step 1: Compare the capacity
Before migrating the windows to SSD, make sure that your SSD is larger than the HDD so that it can hold all the files. In case, if the SSD is smaller than HDD, then you will end up with the problem.
To check the capacity of each drive, you can plug-in the SSD into your system and once you have noted the SSD in your windows explorer, then right-click on both drives and you will get an option called “Properties” and select that. You can able to check the capacity of each drive.
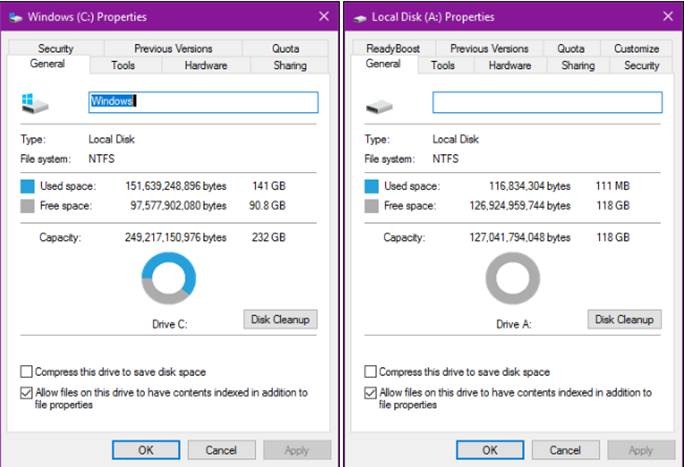
If in case, the capacity of SSD is smaller than the HDD as shown in the above images, then you need to delete some files and make them come under the available capacity. Also, you can use some cleaning apps to clear the junk files.
But if you can’t delete the files as everything seems to be important then you can store some of your files in the new place of the system. Here are some options to save your file in other places;
- You can use the external hard drive to store some of your files. So, you can move your files to this drive by minimizing the capacity
- If you are a desktop user, then here is another option for you, which is to move your files to the second internal drive. This is not available for laptop users, so desktop users can buy a large, extra hard drive to move their files here
- The final option is a cloud storage and this option can be used if you don’t find any extra drives and in that time, you can transfer the files to the cloud-based options like Dropbox or OneDrive. Maybe it will take a long time to transfer your files to your cloud folders
These options are only applicable when your HDD is larger than your SSD, but if your SSD has enough space to store all the files then you can skip the above-mentioned methods.
Read more:
Top 5 Benchmarks SSD That Are Par With The Benchmarking Standards
Step 2: Update the SSD
SSD is a technologically new term and updating the SSD will be varying for each drive. Even if you are using the older version, during the upgrade you will face some issues. Each drive has its technologies to update the drive, some system requires a special CD for upgrade and others will upgrade within the Windows.
The best way to find out your updating technologies is by visiting your drive manufacturer site and learn more about your drive and its upgrading methods.
Step 3: Clone your drive
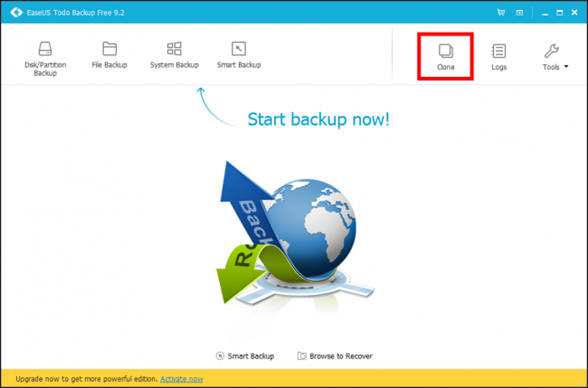
To start the cloning process, click “Clone” on your main screen. You will find the clone option on the system.
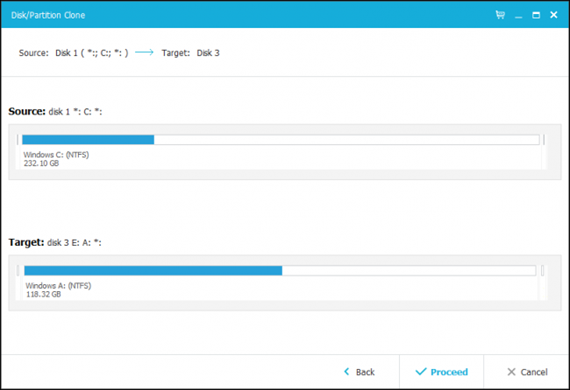
Then select the drive that you want to migrate from HDD to SSD, and then click the nest option to proceed.
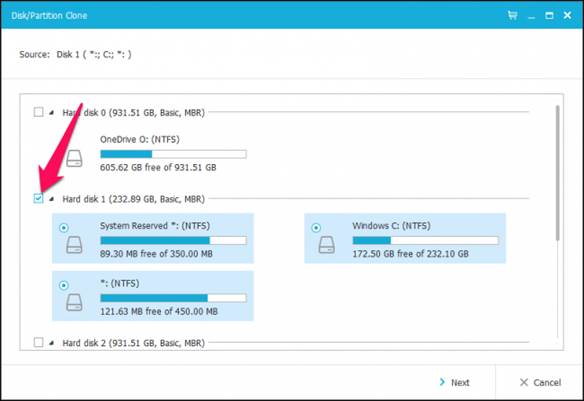
Now it’s time to migrate the drive to your SSD, but before doing that make sure you are choosing the right folder as choosing the wrong one can make you lose data.
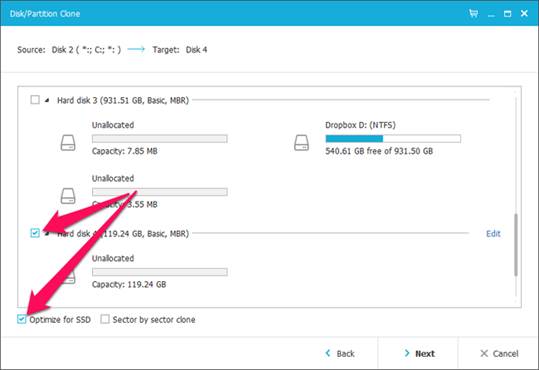
Now, before clicking next click the edit button which is next to your SSD that will show you how your resulting drive may look like.
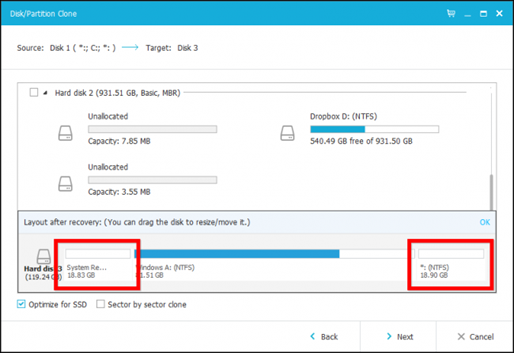
In the edit option, if you want to resize then you can even do that. So for resizing, you need to drag the handles to fill the rest of the empty space.

Depending on your drive’s layout, you can alter the things and once you have done your work, click OK to continue.
Step 4: Activating the clone
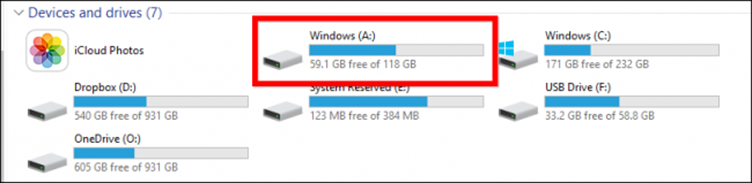
Once you have finished all the steps, your drive will be visible in File Explorer. For this, you need to shut down your computer, remove the old drive, and replace the new drive. Restart your computer and the new drive will automatically start booting.
But if you are using a desktop, and want to have the old drive for backup purposes then you need to start to boot your system BIOS. For this, your new drive is the first to finish the boot process.
Once you have finished the booting, your new drive will be visible in the C-drive.
Step 5: Finishing touches on SSD
Once you have done all the steps and can able to see the drive running, few trimming steps need to be done.
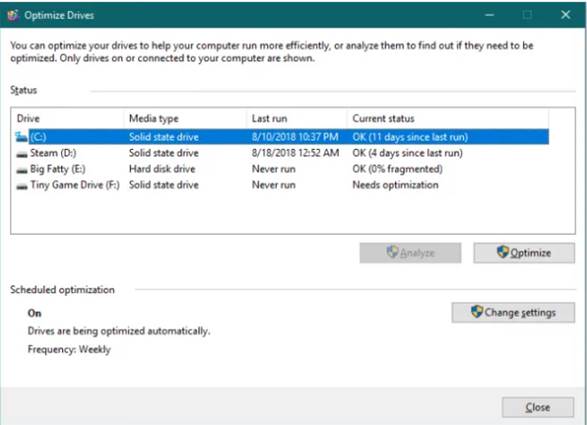
You need to find out the new SSD and perform all the TRIM functions on regular basis, for this click the Start button and then type “Defragment” and then click “Defragment and Optimize Drives”.
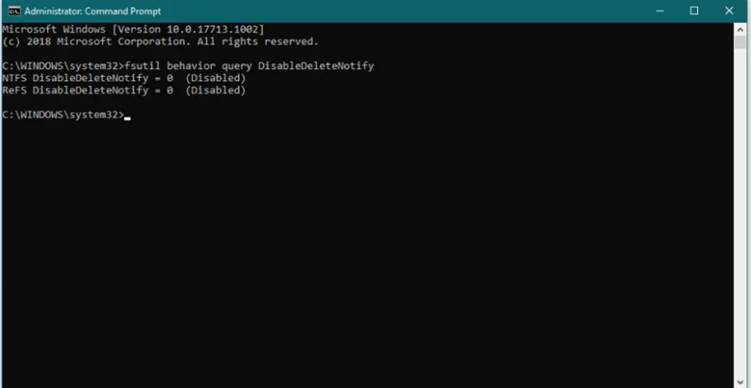
There is another option to check TRIM is via Command Prompt. Open up a command prompt using administration access and then type command. If you get 0 TRIM is enabled or if you get 1 TRIM is not enabled.
Bottom Line:
So, migrating your windows from HDD to SSD cloning without installing is the best and the most advisable way to follow to improve the performance of your system. Depending on the type of drive, you are using for storage you need to select the SSD. SSD’s are smaller than HDD’s so changing your windows can improve durability and reliability.